
Selection-Column
📘 Developer Guide
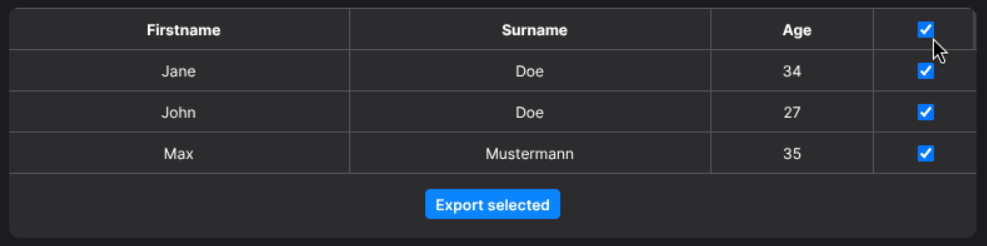
With the Selection-Column Brick, you are able to display a selection in form of a checkbox in your tables.
🔁 Example
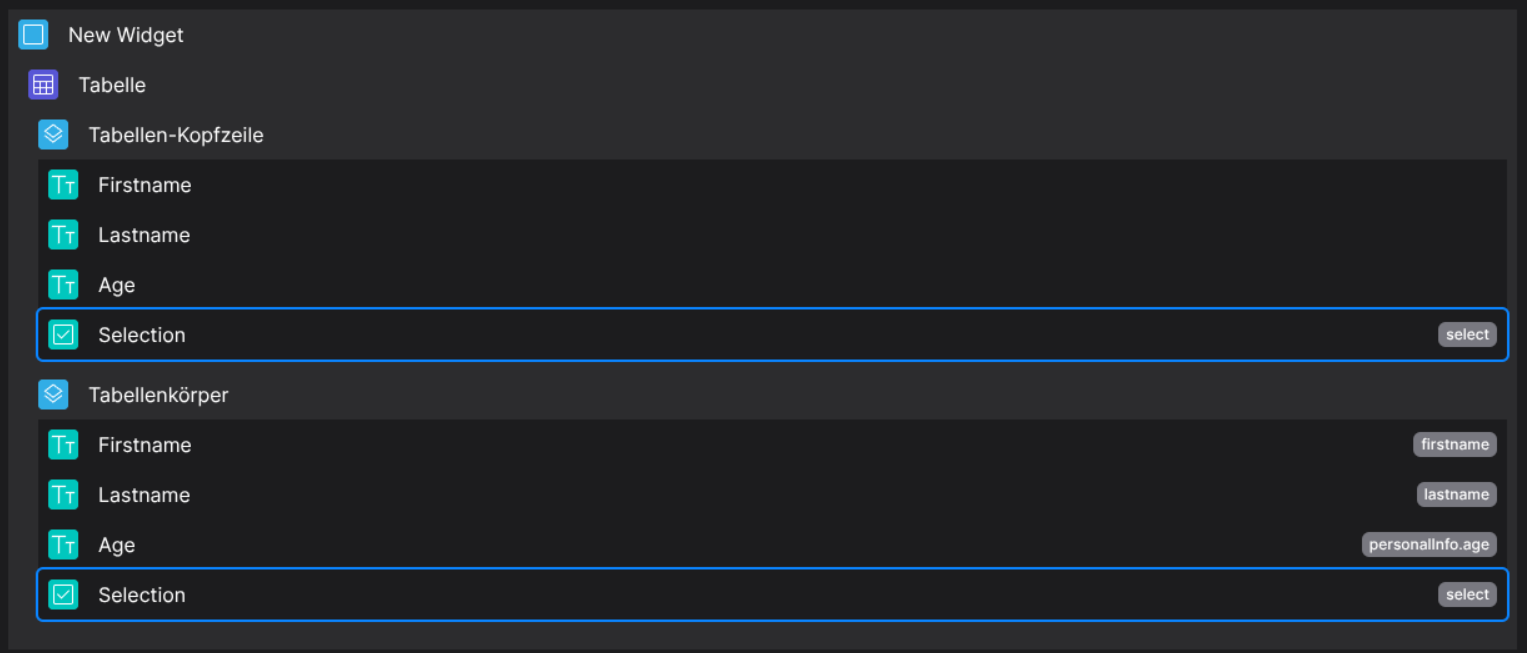
Designer
(DropableDroppable in body columns and header columns)
Runtime

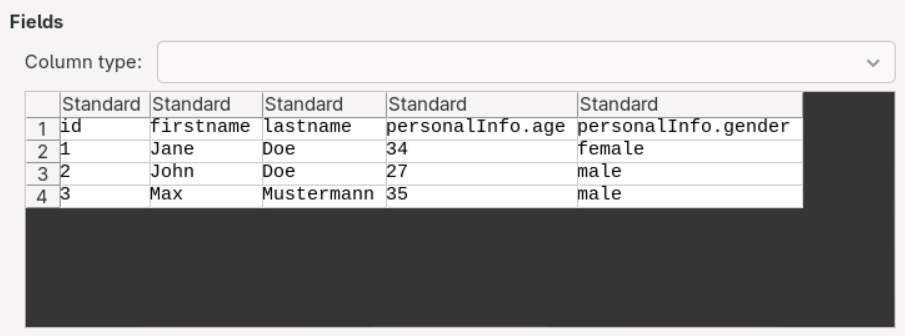
This example uses the following data set:
{
  "data": [
        {
            "id": 1,
            "firstname": "Jane",
            "lastname": "Doe",
            "personalInfo": {
                "age": 34,
                "gender": "female"
            }
        },
        {
            "id": 2,
            "firstname": "John",
            "lastname": "Doe",
            "personalInfo": {
                "age": 27,
                "gender": "male"
            }
        },
        {
            "id": 3,
            "firstname": "Max",
            "lastname": "Mustermann",
            "personalInfo": {
                "age": 35,
                "gender": "male"
            }
        }
    ]
}
⚙️ Configuration Properties
(Extends BodyCell or HeaderCell)
component: 'FyzSbTableCellSelectComponent'
config
See HeaderCell and BodyCell for more information.
🛠️ Usage
Designer
(Use the build in configuration Inputs in the right Side-Nav)
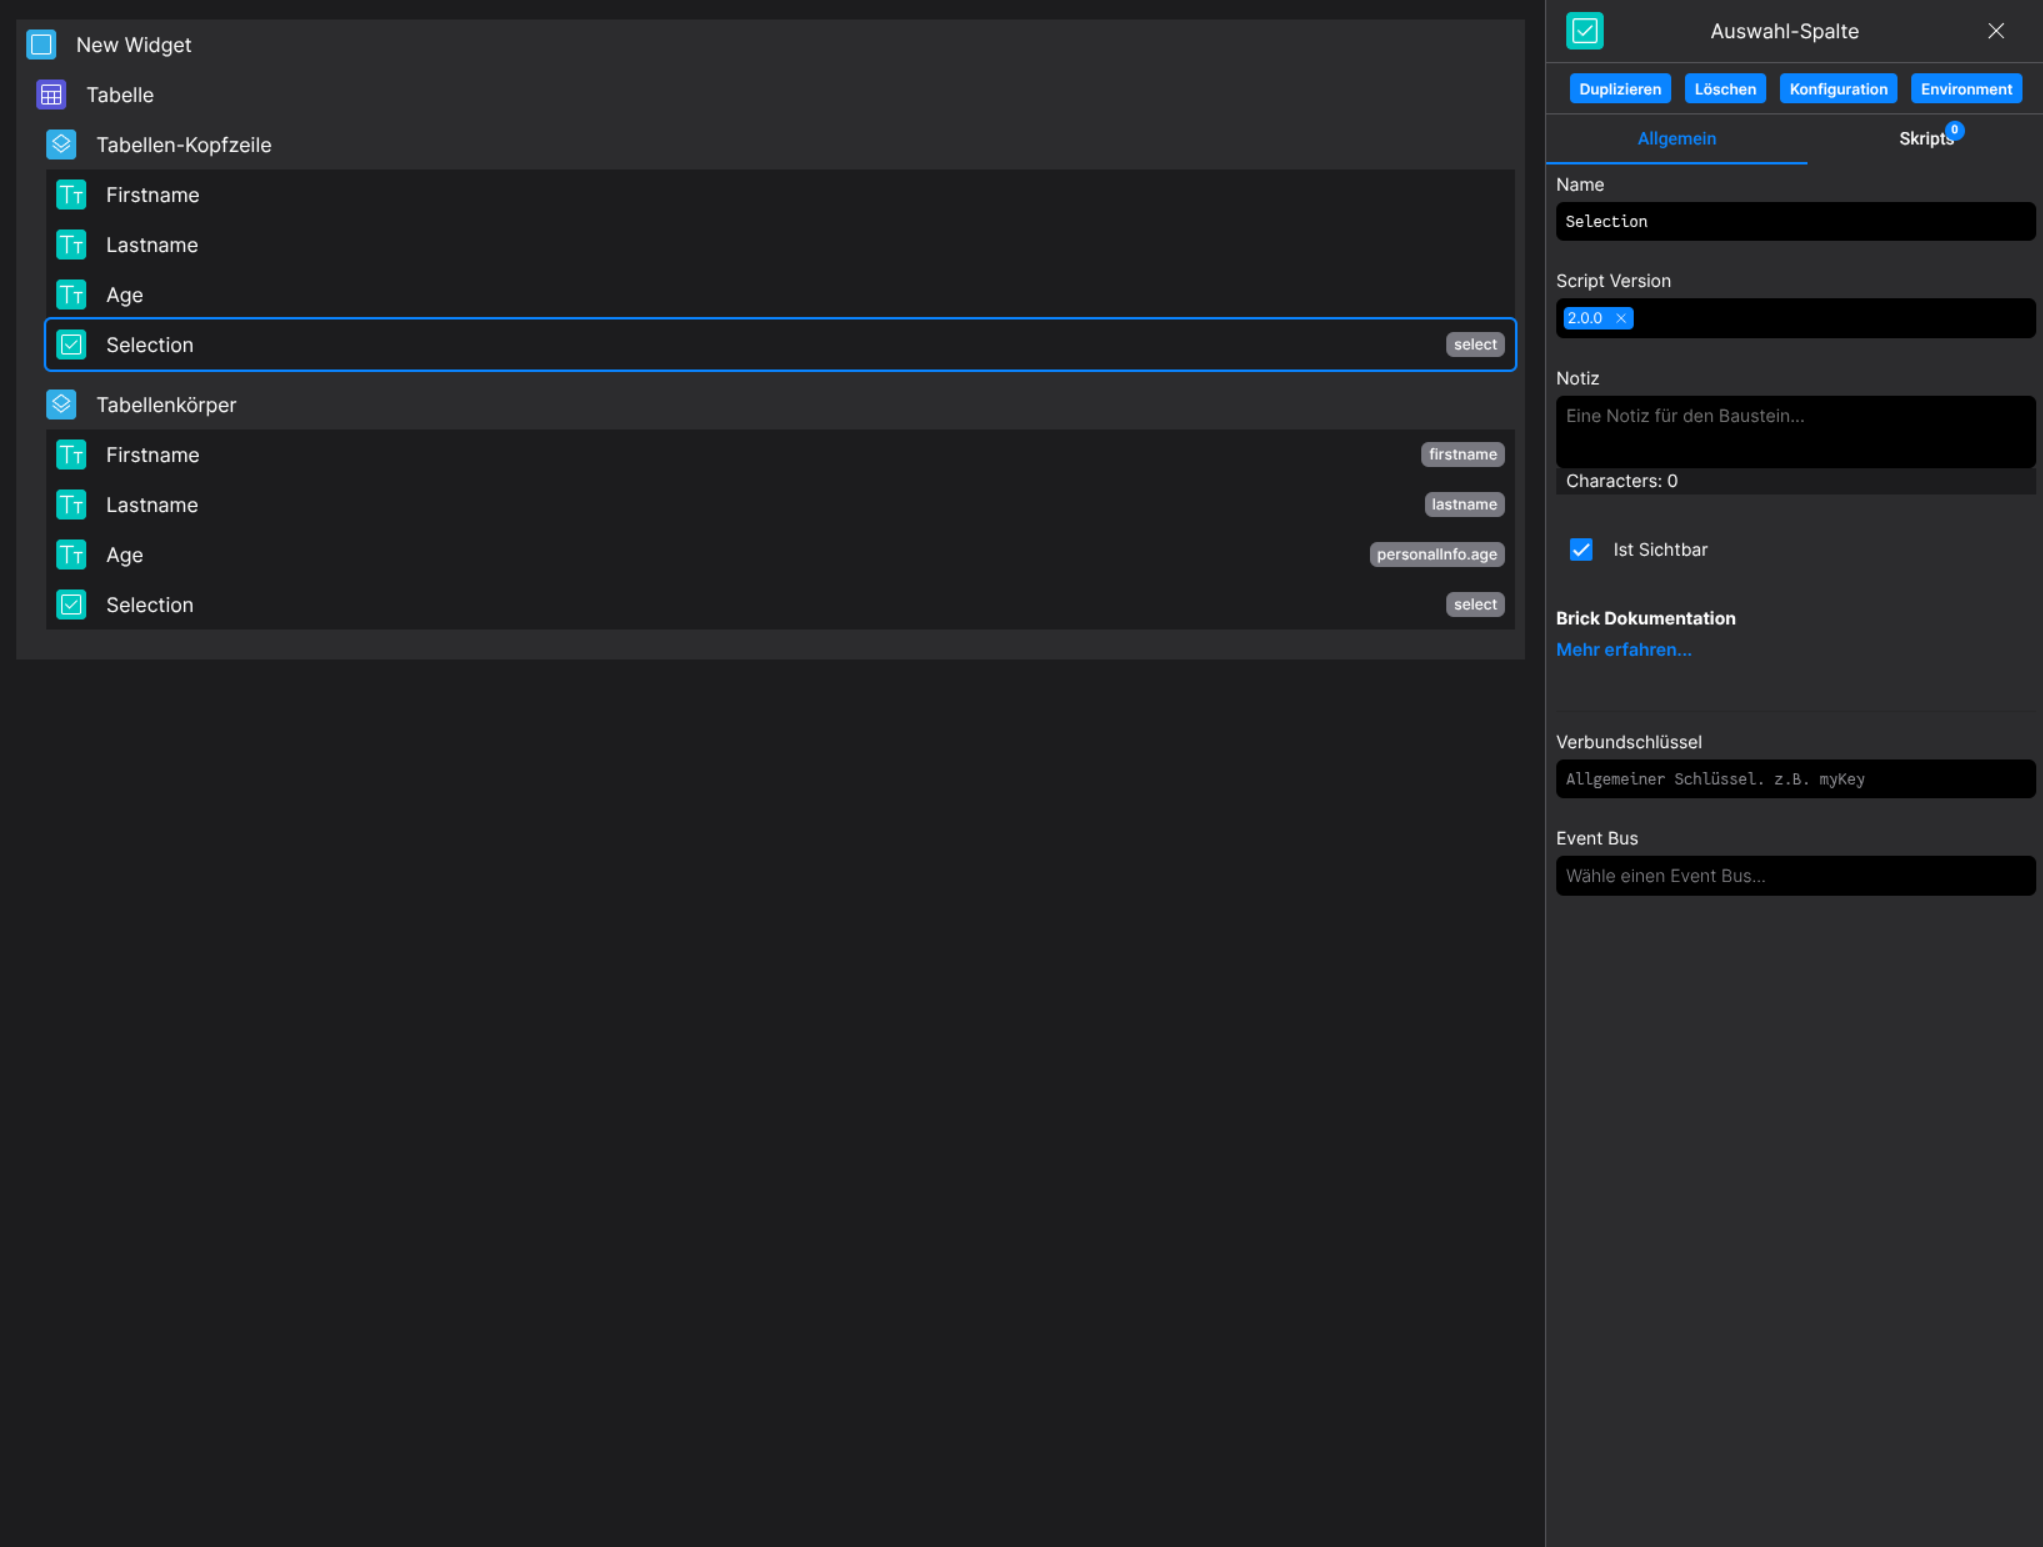
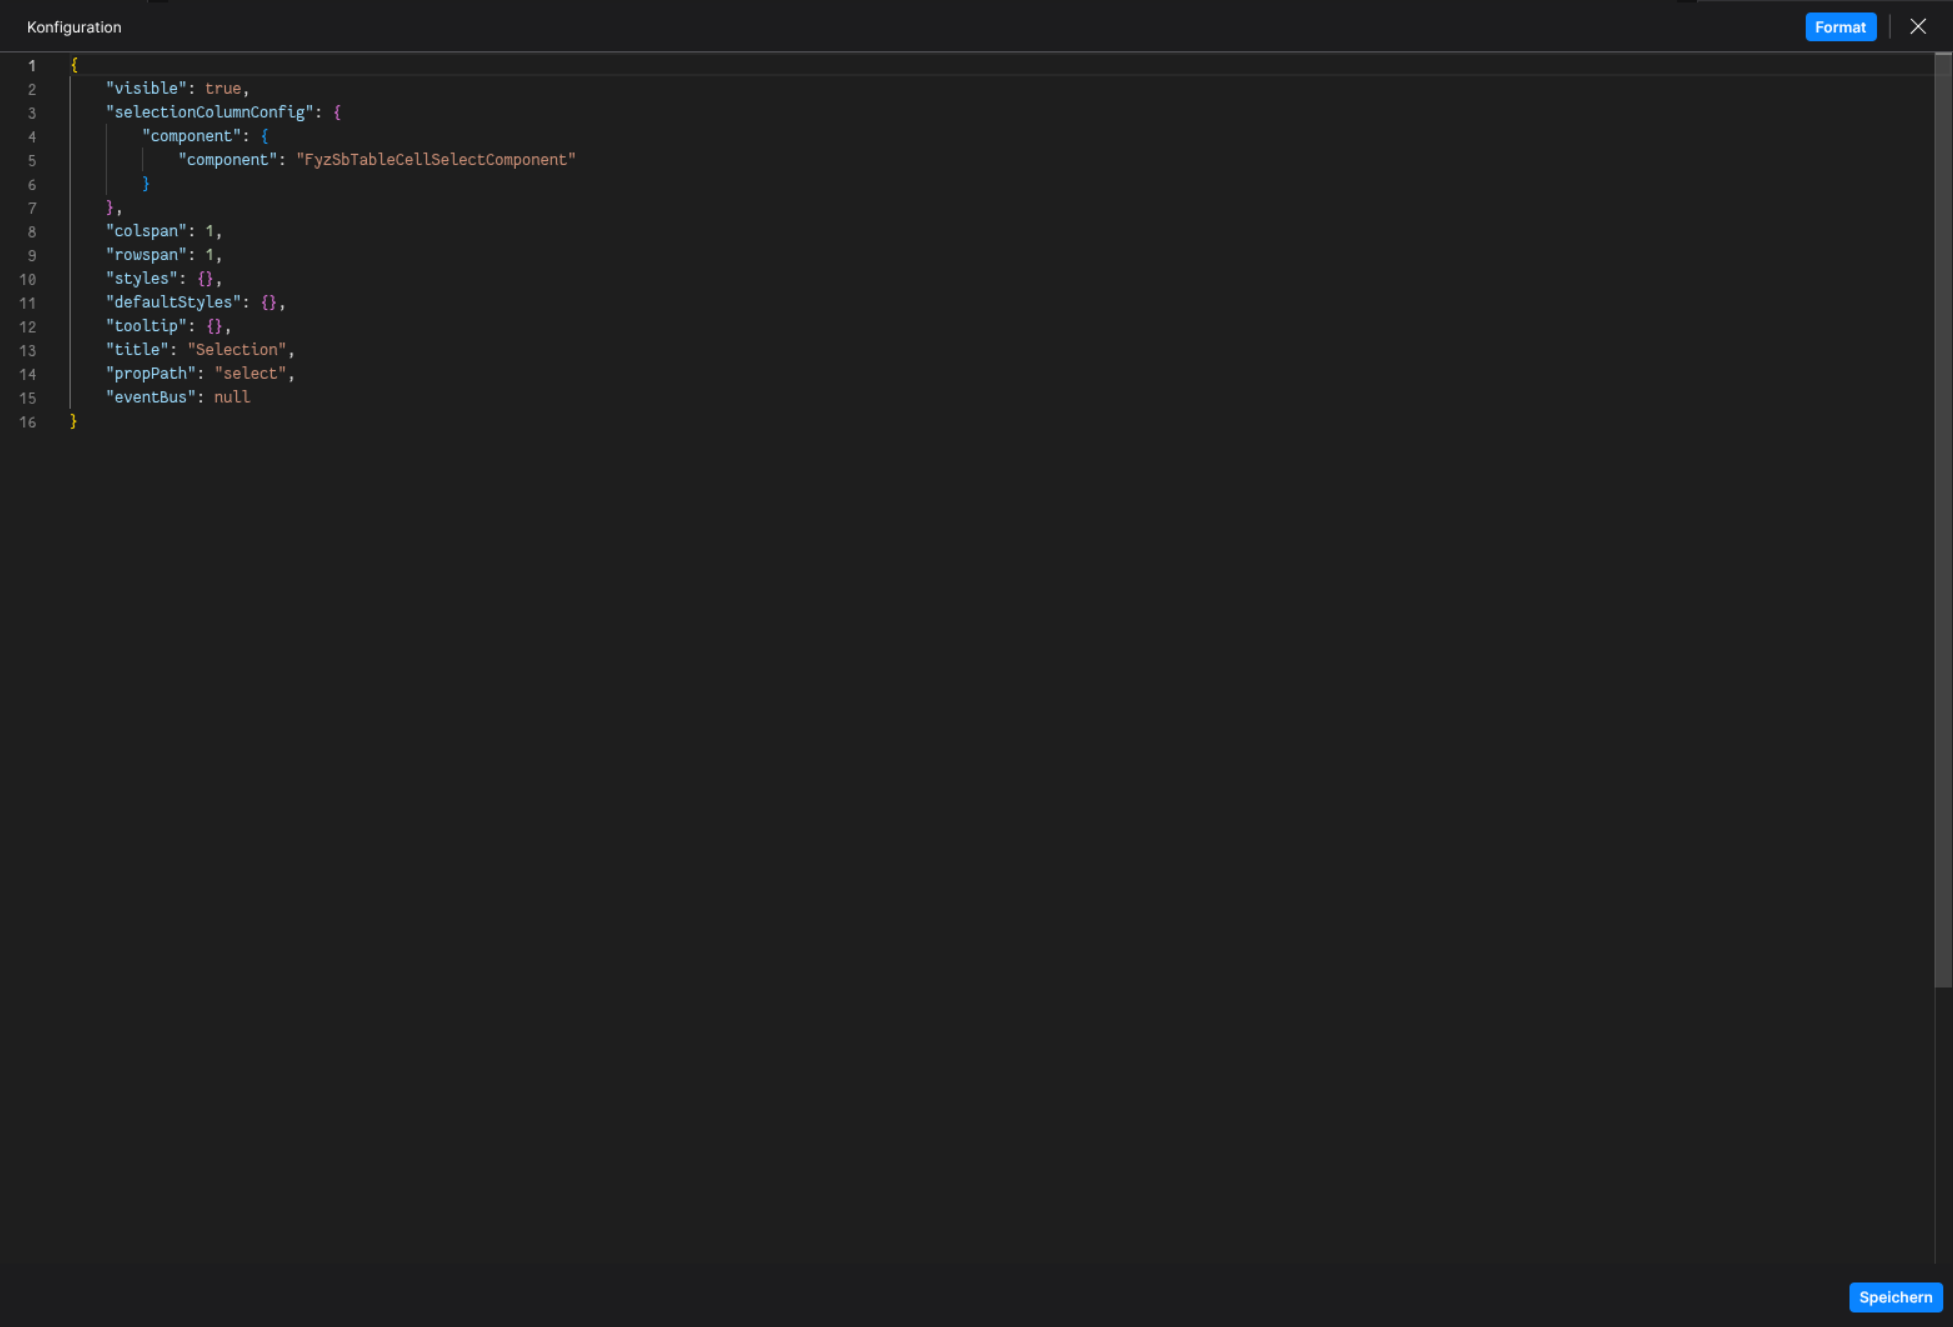
Config
(Edit the whole configuration of the Selection-Column to your liking)
2.⌨️ Programmatical Data
2.1 How to react on table selection changes
Following a small example on how to react on table selection changes
This example provides the ability to export data based on the current table selection in combination ofwith a action button on the dashboarddashboard.
FirstFirst, create the needed brick layoutlayout:
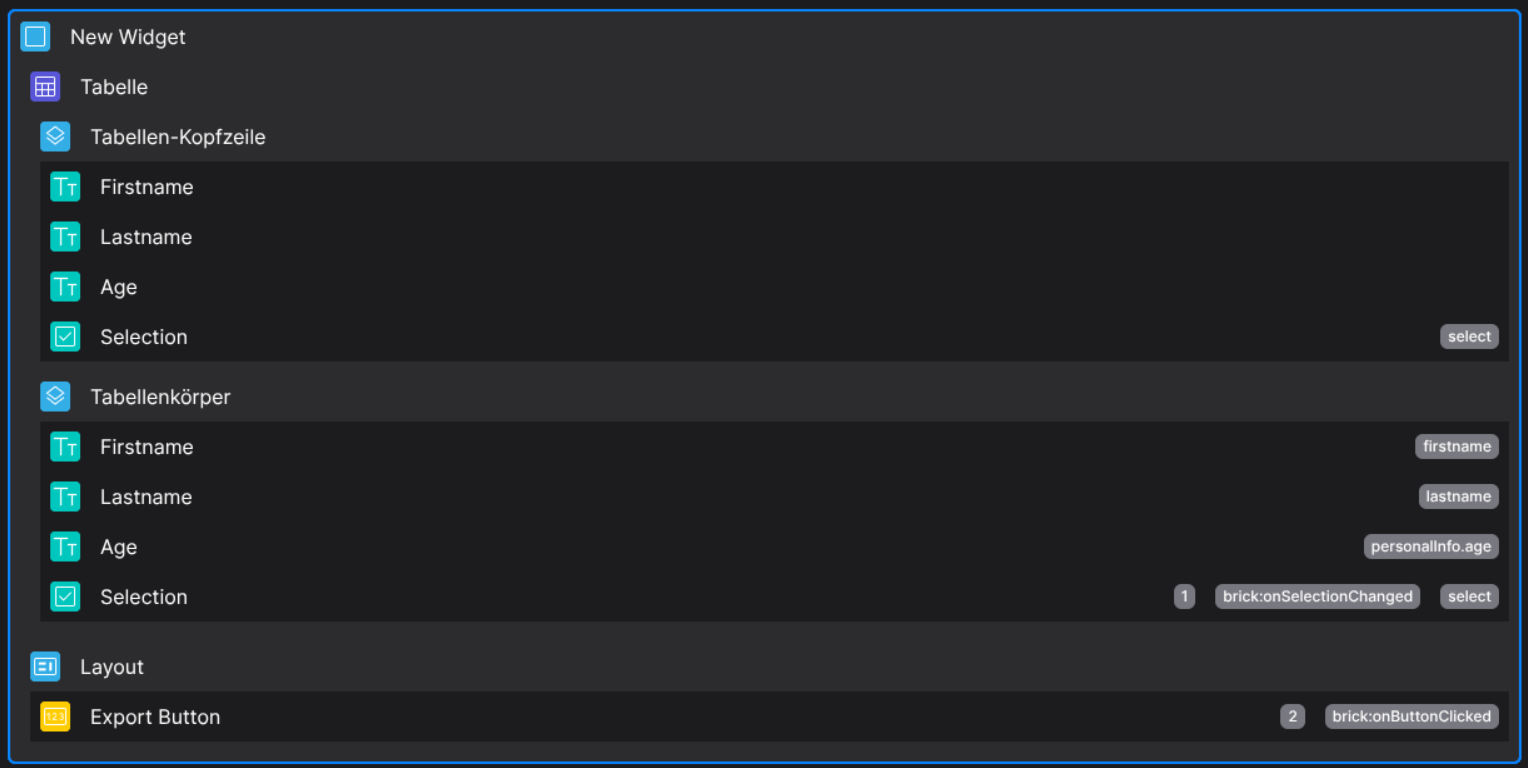
Add the relational key to any selection brick in the table, for this example we use onSelectionChanged:

We want to toggle the disabled state of the Export Button depending on whether a selection is made or notnot.Also
weAlso, save the table selection data to the scoped environment, so we can later fetch the required datadata:

// Helper function
const emitFunc = (shouldDisable) => fyzScope.event.emit({ name: "toggleDisabledBtn", value: shouldDisable });

// Write the table selection into the scoped env
fyzScope.env.setProp("currentSelection", actionData);

// actionData is of type Array, emit depending on the current selection
actionData.length === 0 ? emitFunc(true) : emitFunc(false);
The fyzScope.event will emitemits the event toggleDisabledBtn, which wecan arebe able to listenlistened to on the Export Button:

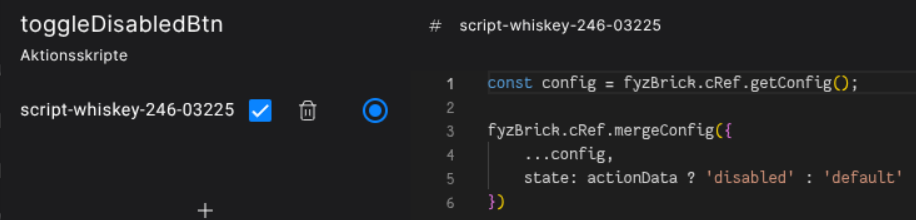
// Get the current brick config
const config = fyzBrick.cRef.getConfig();

// Toggle the button depending on the actionData, which will passed in as boolean
fyzBrick.cRef.mergeConfig({
    ...config,
    state: actionData ? 'disabled' : 'default'
})
This will result in the button disabling/enabling depending on the current table selection

Now we will implement the logic to export the selected data to ana CSV after we click the action button
We use the onButtonClicked action event, which gets fired by the action button itself
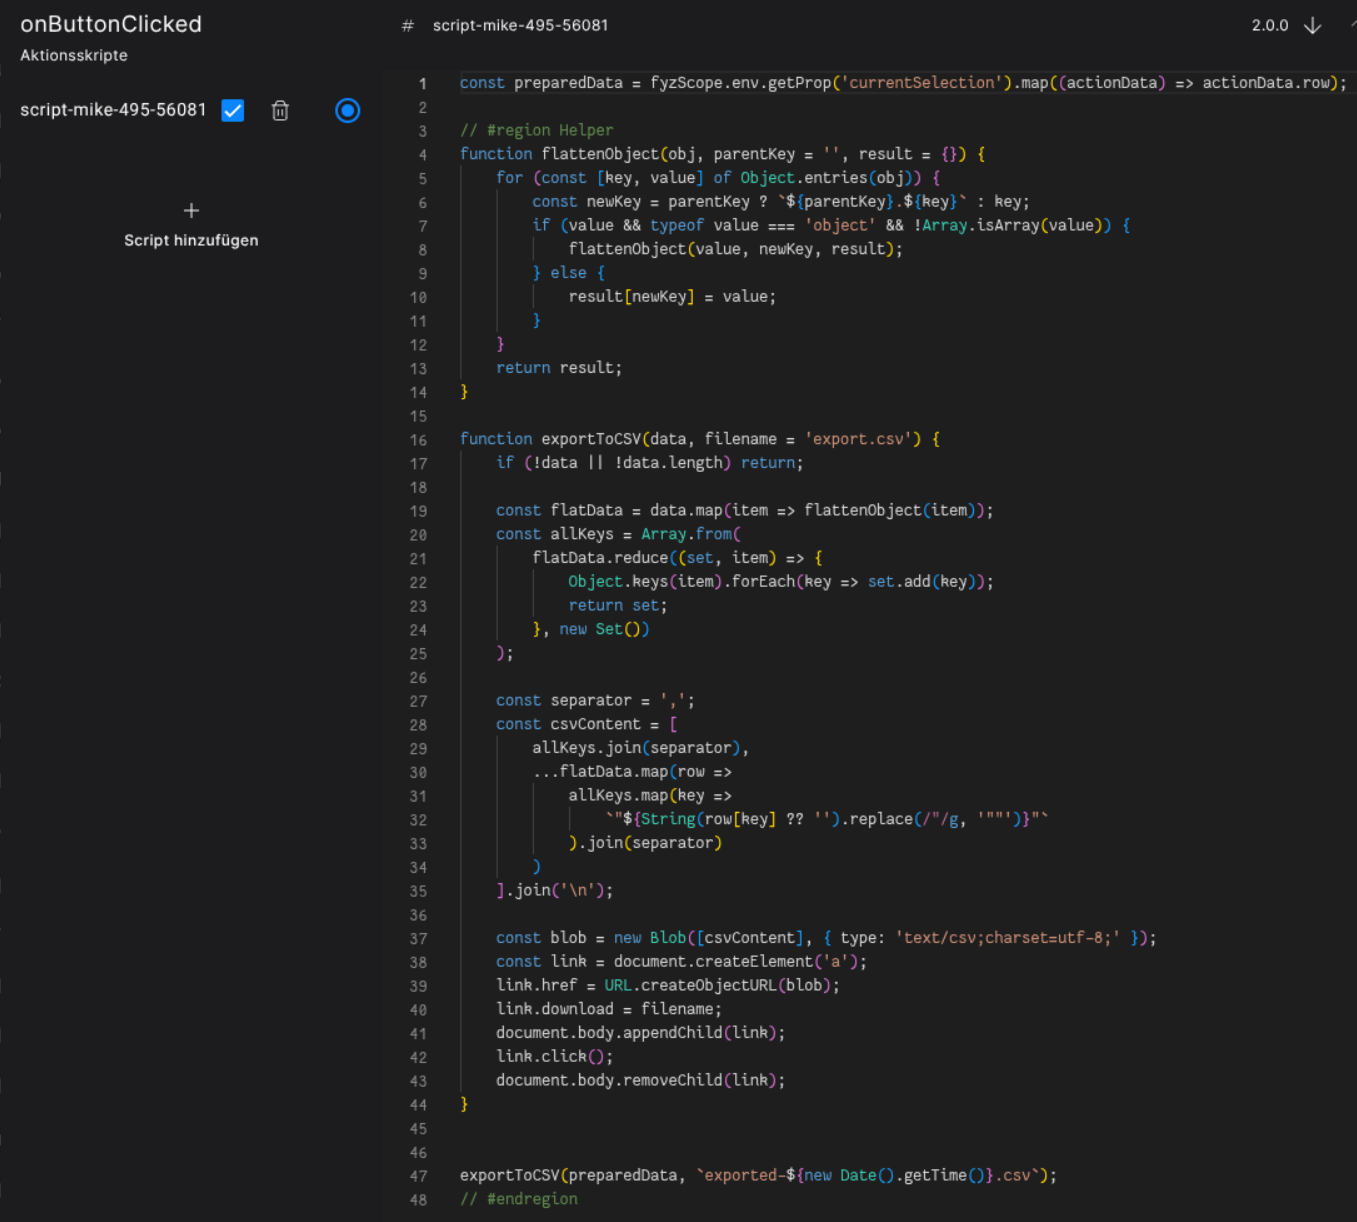
// Get the previously saved env variable of the current table selection
const preparedData = fyzScope.env.getProp('currentSelection').map((actionData) => actionData.row);

// #region Helper

// Flatten the row data, so we can also export nested objects
function flattenObject(obj, parentKey = '', result = {}) {
    for (const [key, value] of Object.entries(obj)) {
        const newKey = parentKey ? `${parentKey}.${key}` : key;
        if (value && typeof value === 'object' && !Array.isArray(value)) {
            flattenObject(value, newKey, result);
        } else {
            result[newKey] = value;
        }
    }
    return result;
}

// Create a simple export function, so we are able to download the csv
function exportToCSV(data, filename = 'export.csv') {
    if (!data || !data.length) return;

    const flatData = data.map(item => flattenObject(item));
    const allKeys = Array.from(
        flatData.reduce((set, item) => {
            Object.keys(item).forEach(key => set.add(key));
            return set;
        }, new Set())
    );

    const separator = ',';
    const csvContent = [
        allKeys.join(separator),
        ...flatData.map(row =>
            allKeys.map(key =>
                `"${String(row[key] ?? '').replace(/"/g, '""')}"`
            ).join(separator)
        )
    ].join('\n');

    const blob = new Blob([csvContent], { type: 'text/csv;charset=utf-8;' });
    const link = document.createElement('a');
    link.href = URL.createObjectURL(blob);
    link.download = filename;
    document.body.appendChild(link);
    link.click();
    document.body.removeChild(link);
}

// #endregion

// Execute the export
exportToCSV(preparedData, `exported-${new Date().getTime()}.csv`);
// #endregion
Now we should be able to click the action button and export the current selected table data to .csv

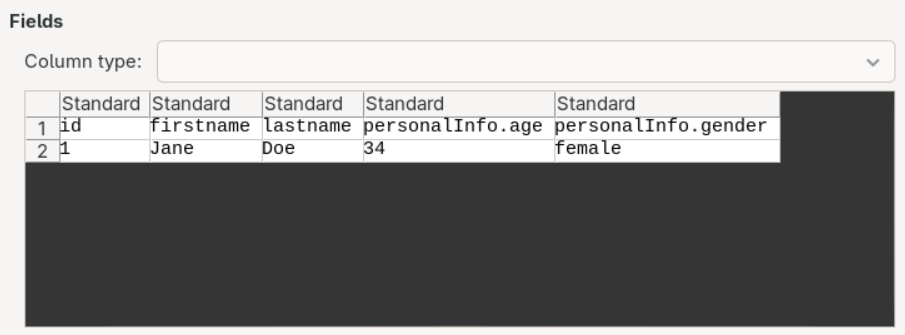
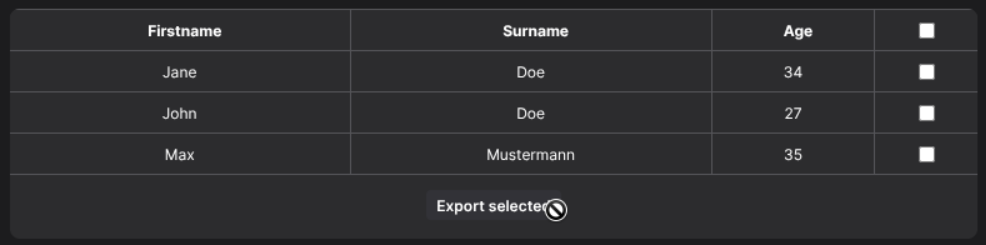
The result is a csv export based on the provided data set, see Data Set