
Selection-Column
📘 Developer Guide
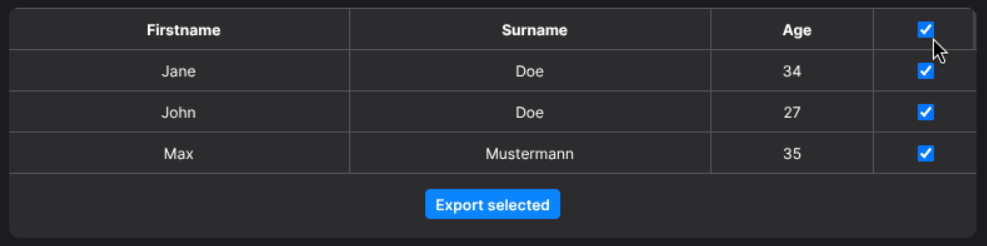
With the Selection-Column Brick, you are able to display a selection in form of a checkbox in your tables.
🔁 Example
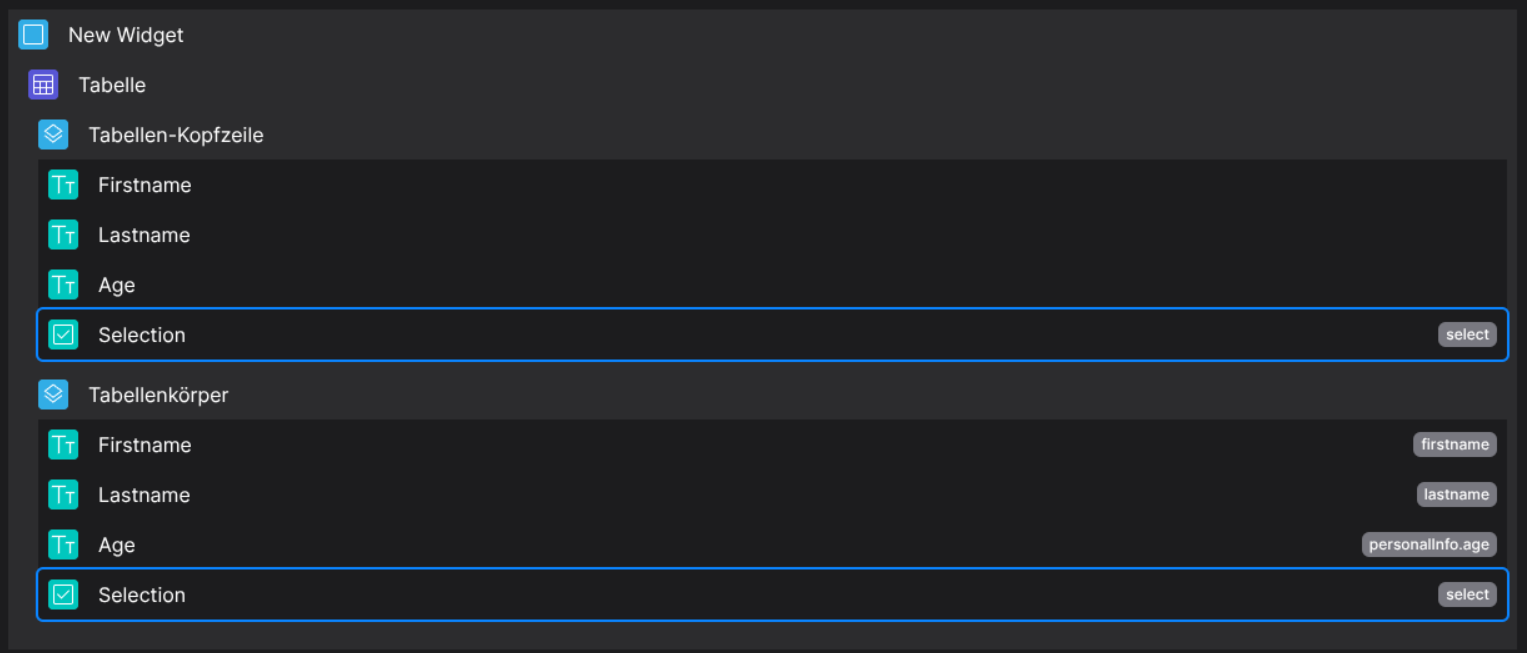
Designer
(Droppable in body columns and header columns)
Runtime

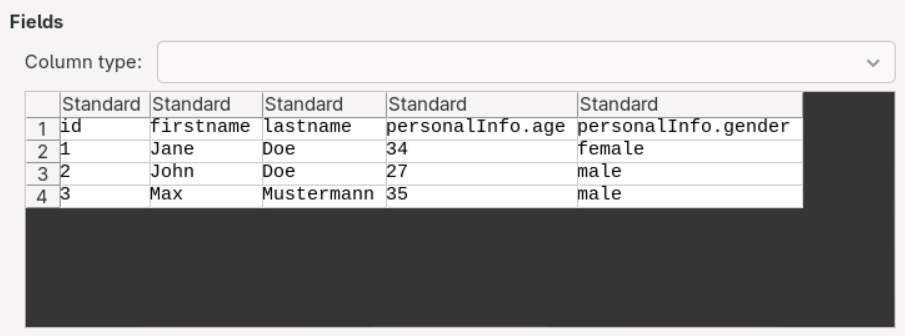
This example uses the following data set:
{
  "data": [
        {
            "id": 1,
            "firstname": "Jane",
            "lastname": "Doe",
            "personalInfo": {
                "age": 34,
                "gender": "female"
            }
        },
        {
            "id": 2,
            "firstname": "John",
            "lastname": "Doe",
            "personalInfo": {
                "age": 27,
                "gender": "male"
            }
        },
        {
            "id": 3,
            "firstname": "Max",
            "lastname": "Mustermann",
            "personalInfo": {
                "age": 35,
                "gender": "male"
            }
        }
    ]
}
⚙️ Configuration Properties
(Extends BodyCell or HeaderCell)
component: 'FyzSbTableCellSelectComponent'
config
See HeaderCell and BodyCell for more information.
🛠️ Usage
Designer
(Use the build in configuration Inputs in the right Side-Nav)
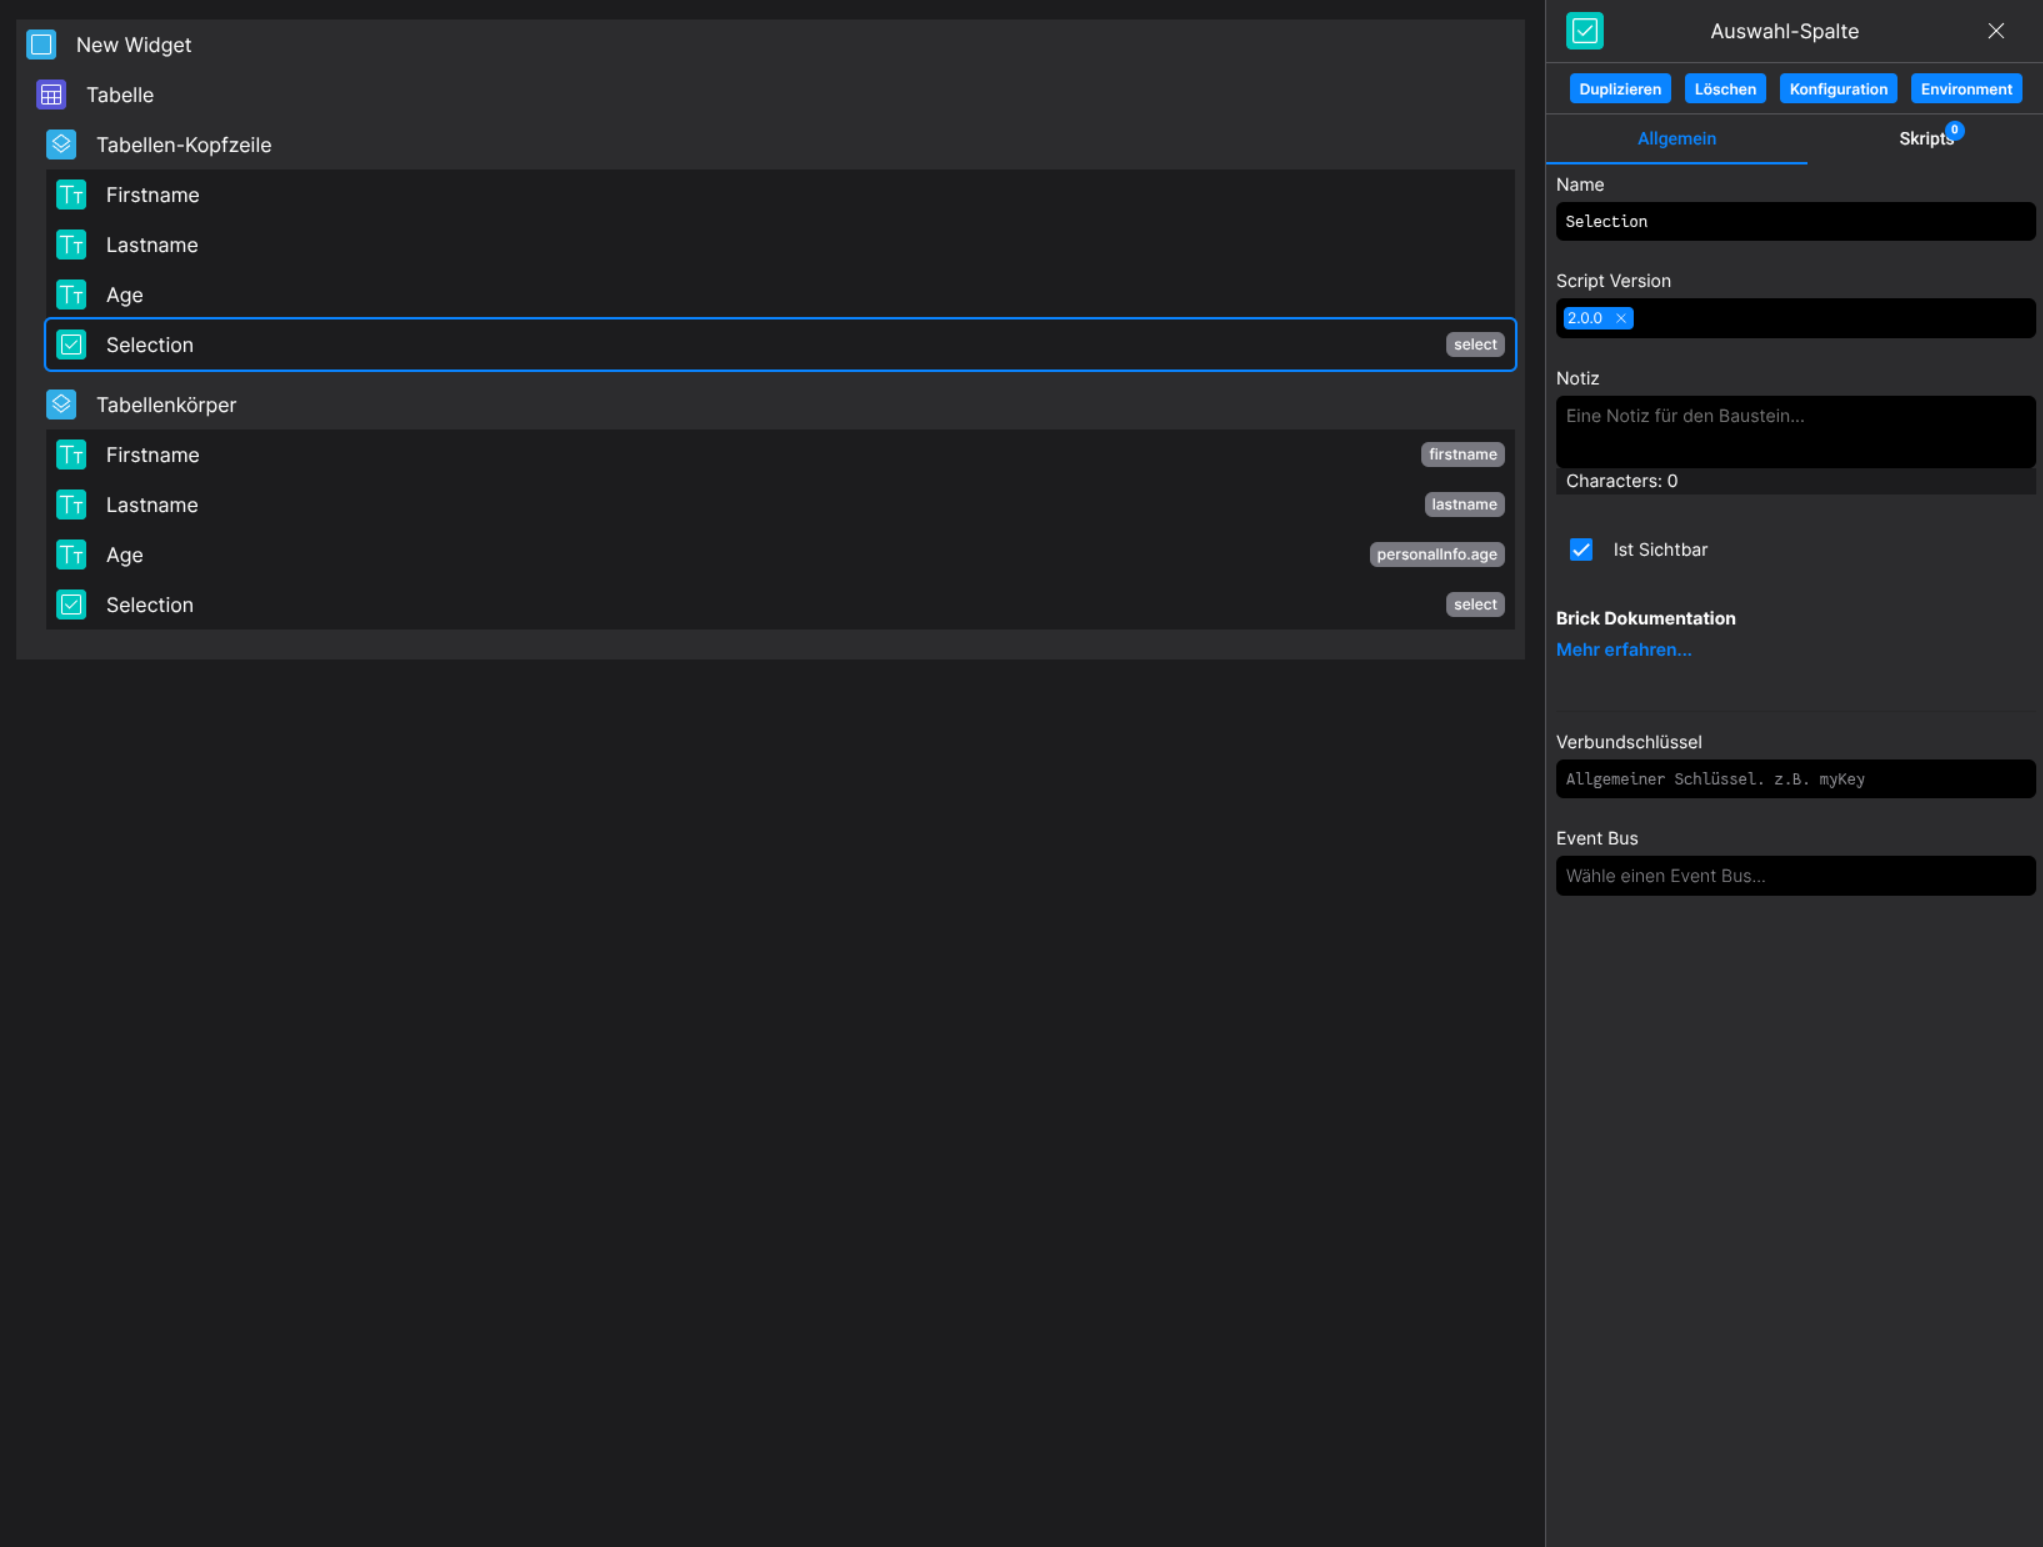
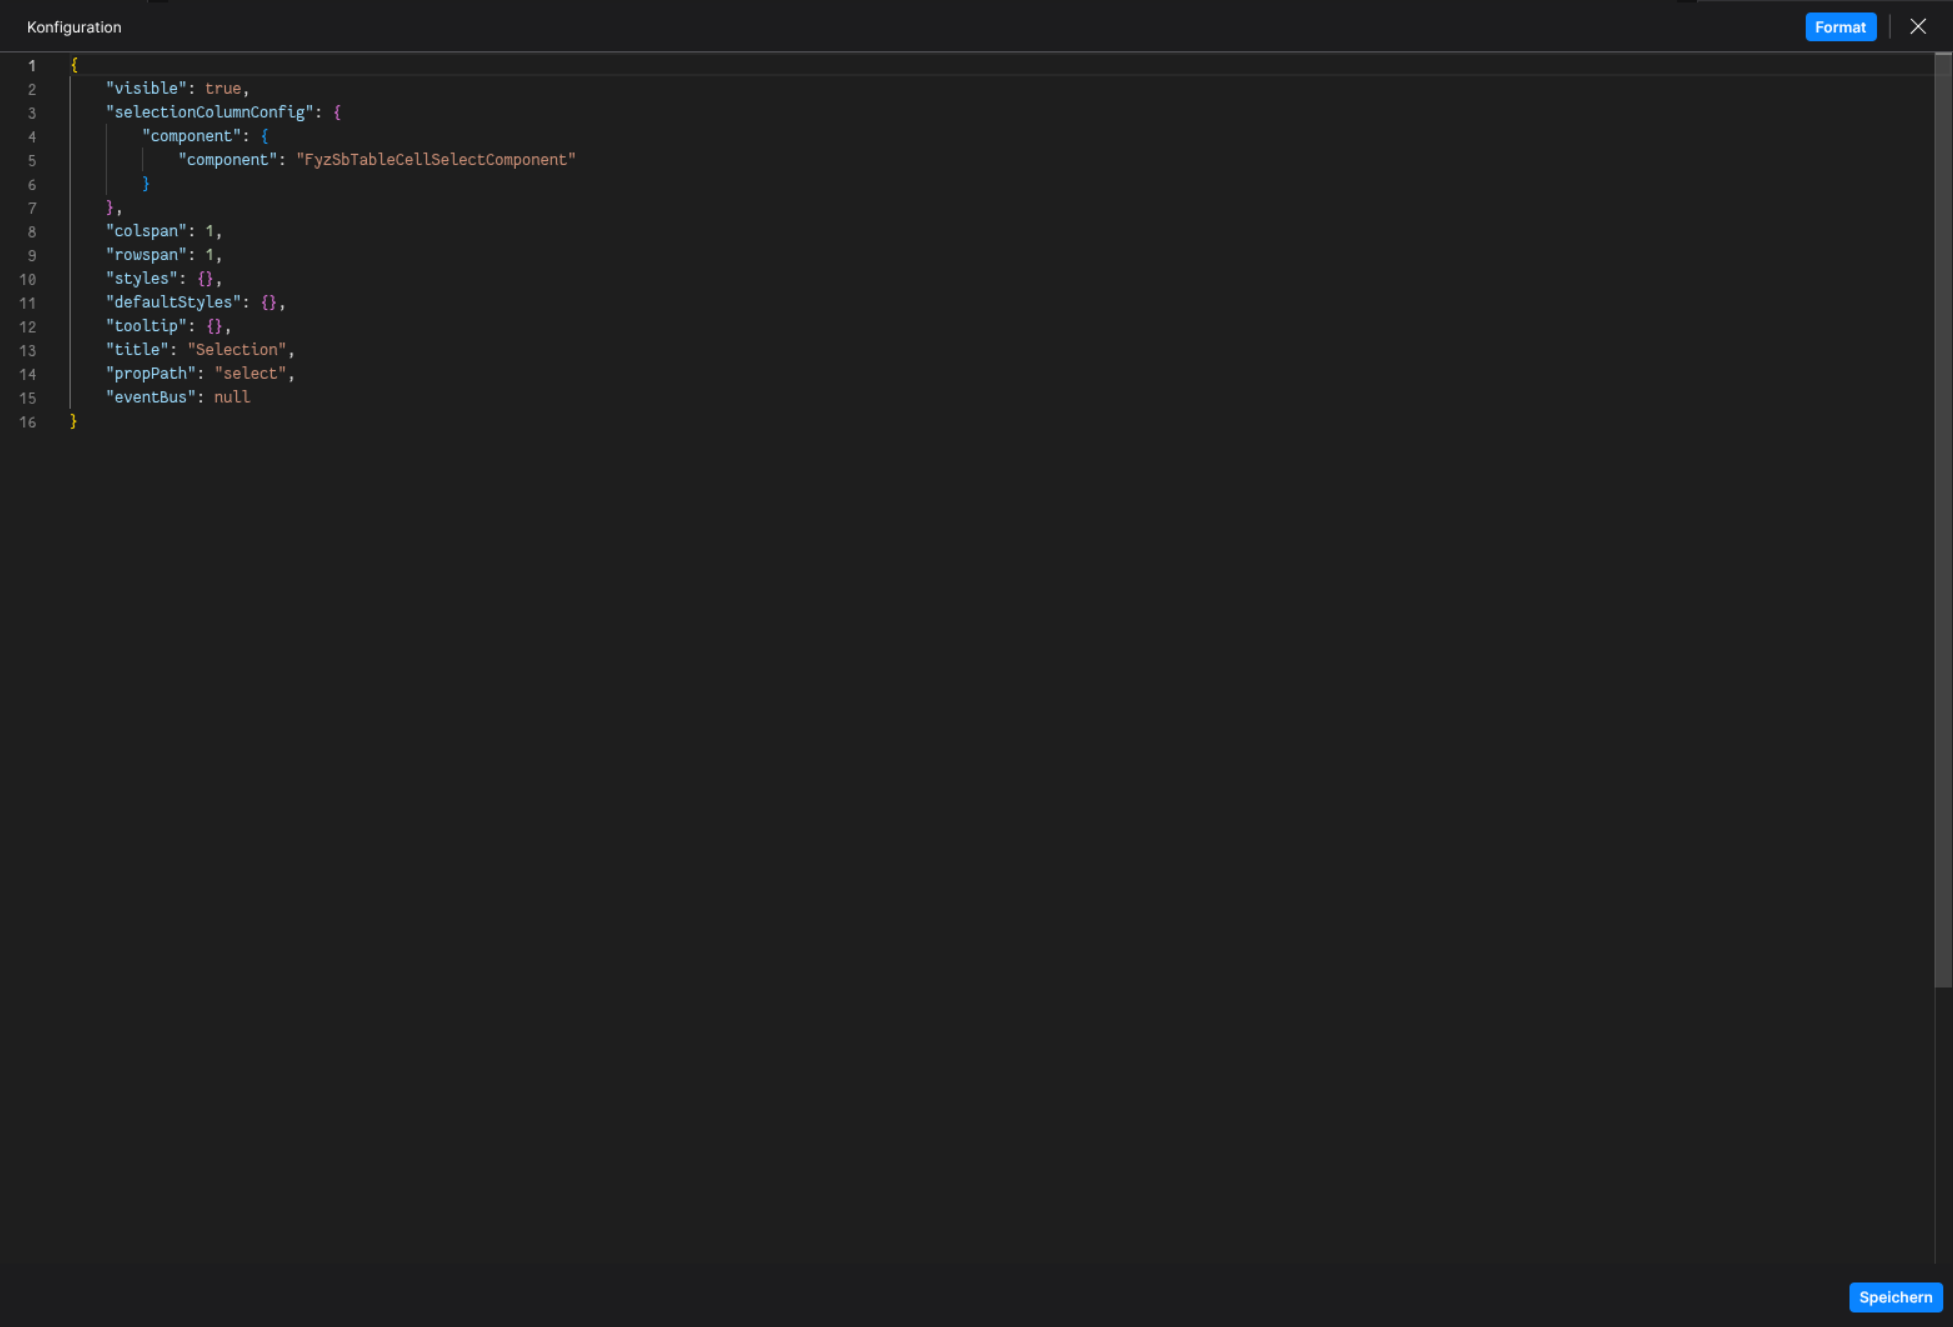
Config
(Edit the whole configuration of the Selection-Column to your liking)
⌨️ Programmatical Data
How to react on table selection changes
Following a small example on how to react on table selection changes
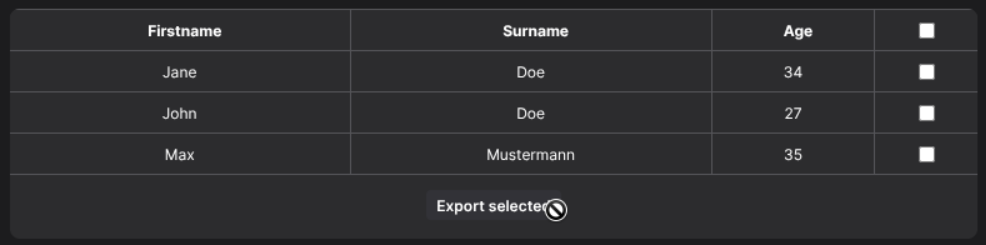
This example provides the ability to export data based on the current table selection in combination with a action button on the dashboard.
First, create the needed brick layout:
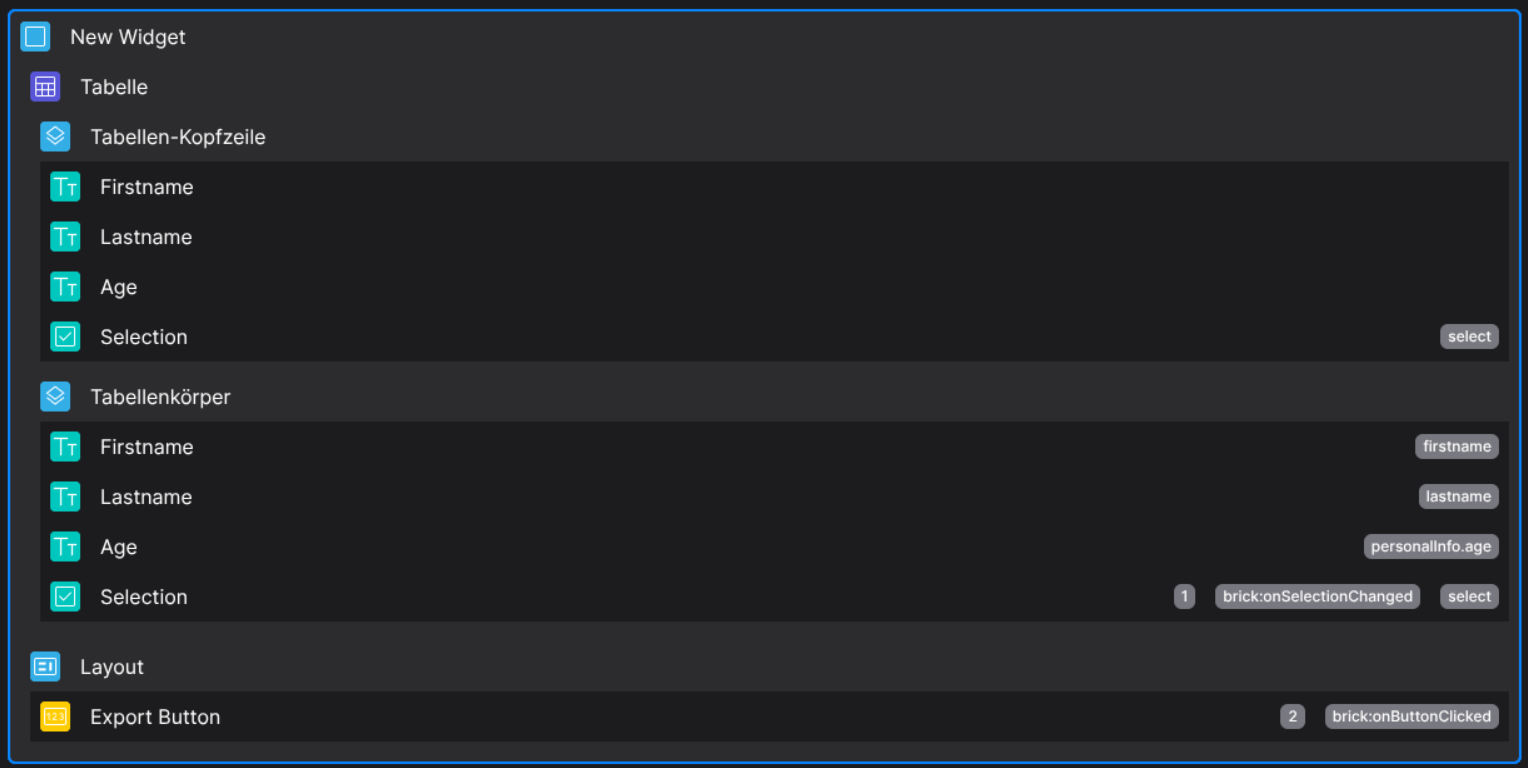
Add the relational key to any selection brick in the table, for this example we use onSelectionChanged:

We want to toggle the disabled state of the Export Button depending on whether a selection is made or not.
Also, save the table selection data to the scoped environment, so we can later fetch the required data:

// Helper function
const emitFunc = (shouldDisable) => fyzScope.event.emit({ name: "toggleDisabledBtn", value: shouldDisable });

// Write the table selection into the scoped env
fyzScope.env.setProp("currentSelection", actionData);

// actionData is of type Array, emit depending on the current selection
actionData.length === 0 ? emitFunc(true) : emitFunc(false);
The fyzScope.event emits the event toggleDisabledBtn, which can be listened to on the Export Button:

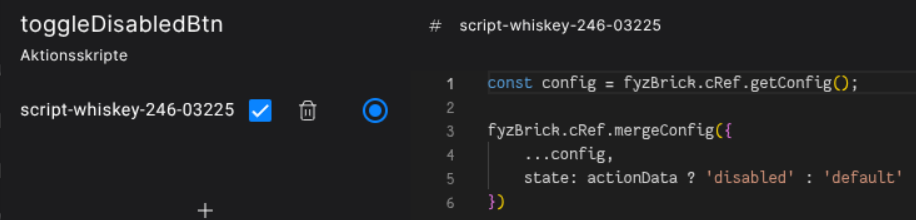
// Get the current brick config
const config = fyzBrick.cRef.getConfig();

// Toggle the button depending on the actionData, which will passed in as boolean
fyzBrick.cRef.mergeConfig({
    ...config,
    state: actionData ? 'disabled' : 'default'
})
This will result in the button disabling/enabling depending on the current table selection

Now we implement the logic to export the selected data to a CSV after the action button is clicked
We use the onButtonClicked action event, which gets fired by the action button itself
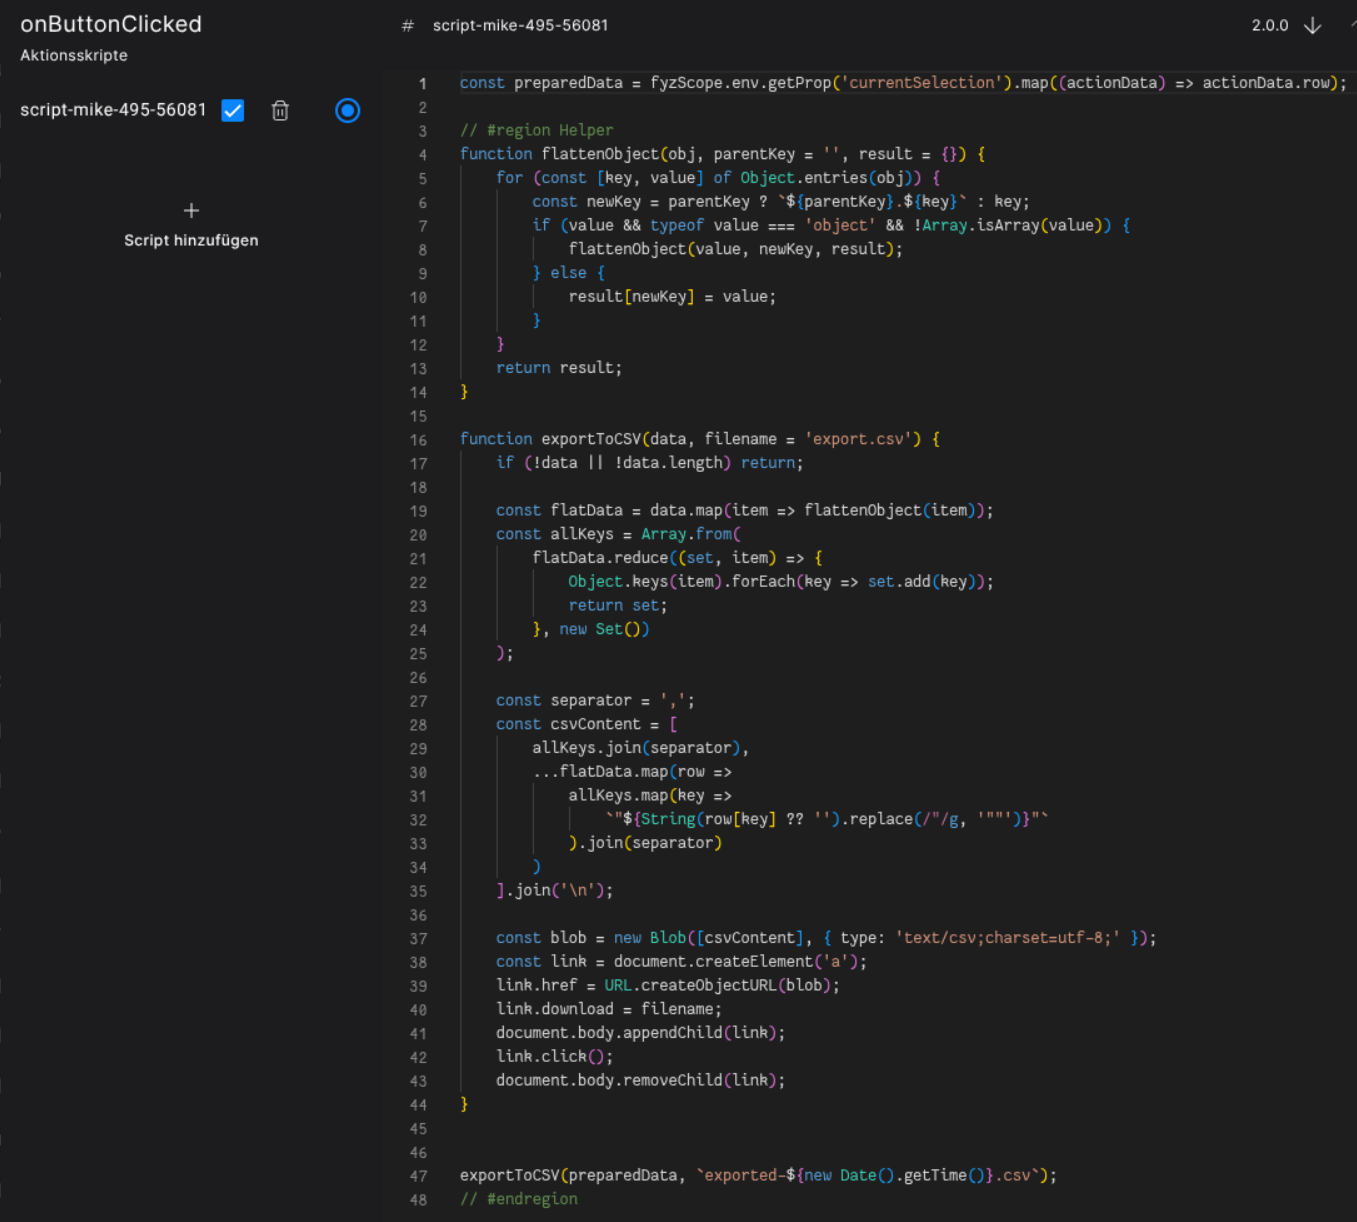
// Get the previously saved env variable of the current table selection
const preparedData = fyzScope.env.getProp('currentSelection').map((actionData) => actionData.row);

// #region Helper

// Flatten the row data, so we can also export nested objects
function flattenObject(obj, parentKey = '', result = {}) {
    for (const [key, value] of Object.entries(obj)) {
        const newKey = parentKey ? `${parentKey}.${key}` : key;
        if (value && typeof value === 'object' && !Array.isArray(value)) {
            flattenObject(value, newKey, result);
        } else {
            result[newKey] = value;
        }
    }
    return result;
}

// Create a simple export function, so we are able to download the csv
function exportToCSV(data, filename = 'export.csv') {
    if (!data || !data.length) return;

    const flatData = data.map(item => flattenObject(item));
    const allKeys = Array.from(
        flatData.reduce((set, item) => {
            Object.keys(item).forEach(key => set.add(key));
            return set;
        }, new Set())
    );

    const separator = ',';
    const csvContent = [
        allKeys.join(separator),
        ...flatData.map(row =>
            allKeys.map(key =>
                `"${String(row[key] ?? '').replace(/"/g, '""')}"`
            ).join(separator)
        )
    ].join('\n');

    const blob = new Blob([csvContent], { type: 'text/csv;charset=utf-8;' });
    const link = document.createElement('a');
    link.href = URL.createObjectURL(blob);
    link.download = filename;
    document.body.appendChild(link);
    link.click();
    document.body.removeChild(link);
}

// #endregion

// Execute the export
exportToCSV(preparedData, `exported-${new Date().getTime()}.csv`);
Now we should be able to click the action button and export the current selected table data to .csv

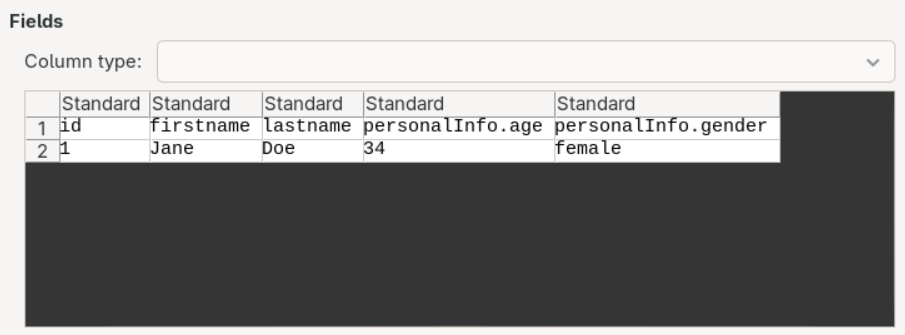
The result is a csv export based on the provided data set, see Data Set